|
My engine is from a 95 Old Cutlass supreme automatic. I do not
know if dimensions are different for engine years.
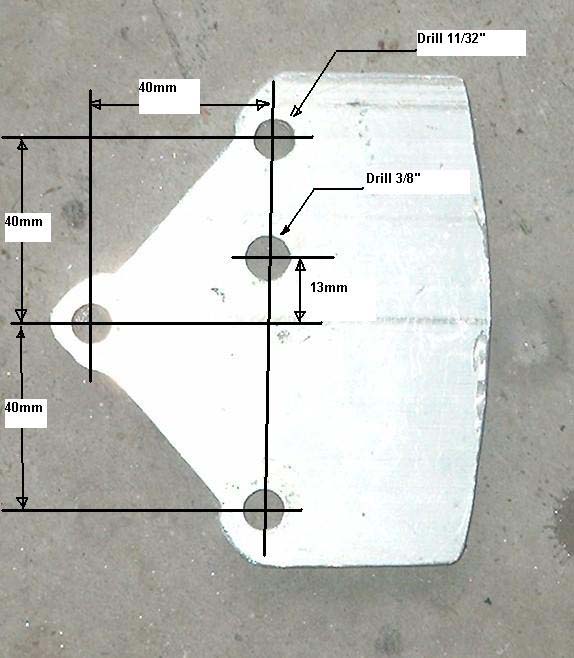
Figure 1 shows the base plate to hold the pulley. I used 3/8
aluminum plate. I drilled the three mounting holes then drew
around them and cut it using a cutoff wheel on a die grinder,
then cleaned it up to fit using a file. The three mounting holes
are drilled 11/32 to match those in the engine casting. I used 1
1/2" x 5/16 grade 8 bolts to fix the base plate to the casting.
The hole for the pulley mount itself is drilled 3/8 and I used a
3" x 3/8 grade 8 bolt to hold the pulley and spacer to the base
plate.
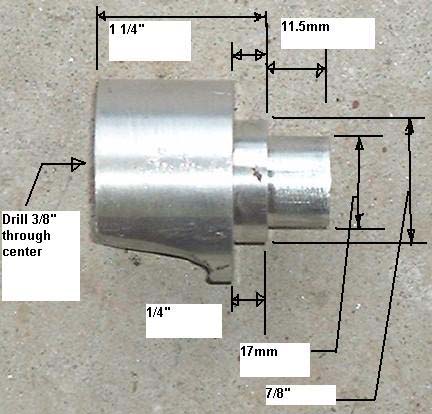
Figure 2 shows the spacer. I had this made from a piece of 1
1/2" aluminum bar. The critical length is the 1 1/4" from the
rear to the front shoulder as this sets the position of the
pulley laterally. I have yet to verify that I have this
measurement correct but so far as I can tell it is pretty close.
The pulley uses a standard 6203 type bearing. The important
dimensions of this bearing are:
Inner race inner diameter - 17 mm
Inner race outer diameter - ~22mm or 7/8"
thickness - 12mm
A 3/8" hole is drilled thought the center of the spacer to allow
it to be bolted to the backing plate.
The smaller spigot should be an easy fit into the pulley
bearing. If you look at the tensioner pulley on the 3.4 you will
see that it is a really sloppy fit on it's mount but as you have
to custom make this part anyway why not get it close.
As the bearing is 12mm thick the spigot length should be just
shy of that. The guy who made mine for me made it 10 thou under
length. This is so that the outer washer that holds the pulley
in place does not bow in too much when the center bolt is
tightened up.
The shoulder part is just to give the pulley some clearance from
the main body of the mount.
Because the spacer is mounted off center it hits the upper part
of the engine casting so you need to cut away some of the spacer
to clear. This is a trial and error procedure but you can get an
estimate of the amount to remove from the picture.
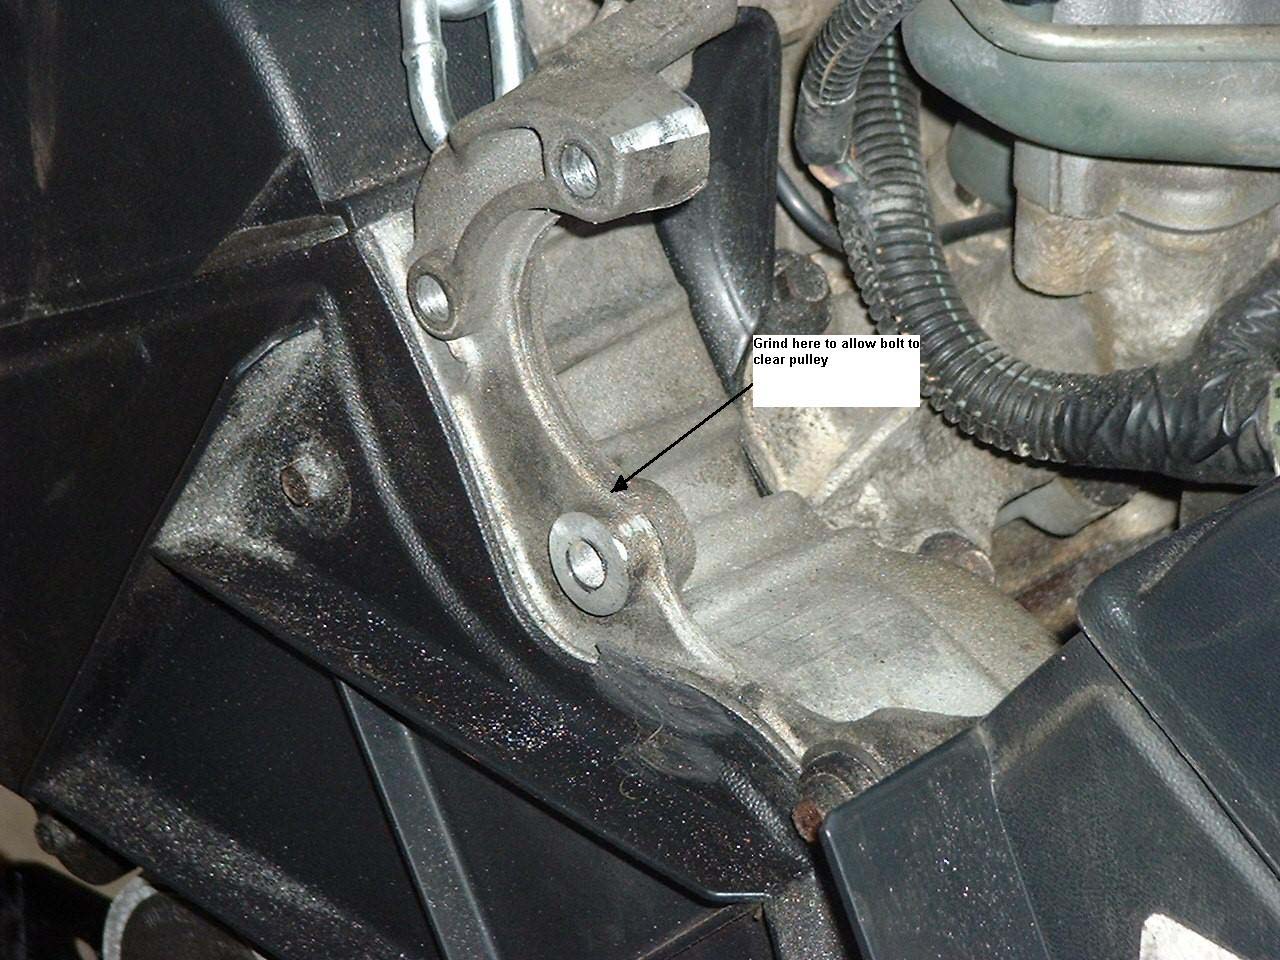
Figure 3 shows where you need to grind the original power
steering mounting casting so that the lower mounting bolt head
will clear the pulley edge.

Figure 4 shows the pulley. It is Napa part number NBH38024. I
got mine online for $29 and change. It is a 109mm diameter
pulley. The original PS pulley is about 130mm which is why you
need to mount it above the center line on the base plate in
order to get the belts lines to match. Thanks to Mike Kaas for
the info that let me find it.
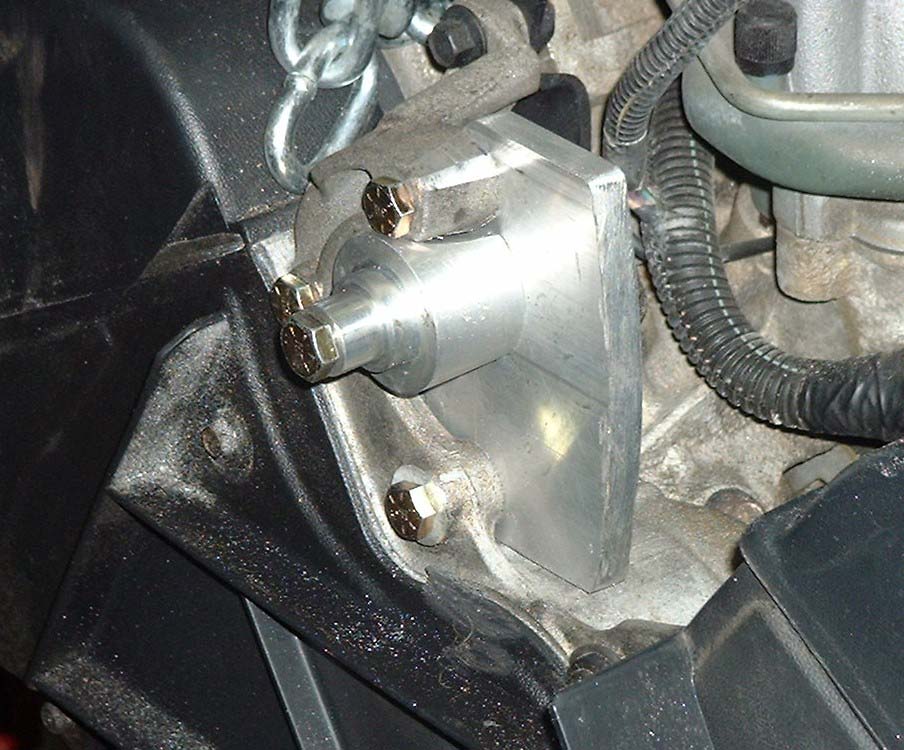
Figure 5 shows the base plate and spacer in place without the
pulley so that you can see how it fits together.
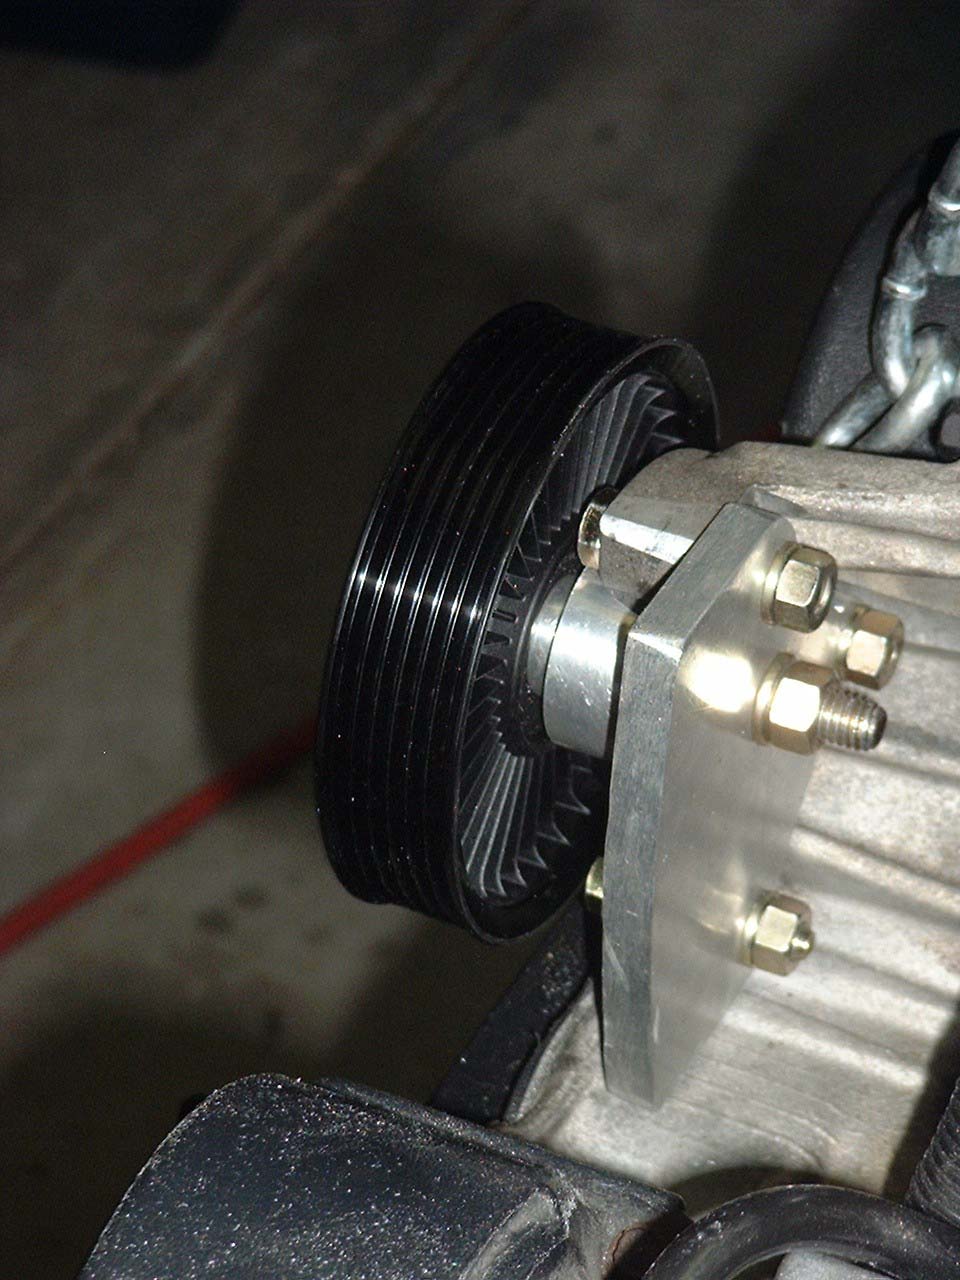
Figure 6 shows the completed assembly.
Author: Dave Ellis AKA
ltlfrari | 