|
2 Stage
Boost Control
*Turbo Gus Mahon,
unfortunately, is no longer with us. He was killed in late
Summer 2002 in a motorcycle accident. He was quite an inventive
person and was able to propel his 2.5L Turbocharged Dodge
Caravan into the 13's at the dragstrip, frustrating many
musclecar owners to no end. We will be reprinting some of his
more generic articles mainly due to the great information they
provide. We are extremely sorry to hear about the tragic
accident that took his life, but will remember always the
contributions he has made to the hobby. The following is the
article in full along with how the results were derived.
A
loose actuator arm (or weak spring) lowers ultimate boost
potential. You might get only 15 psi at max (with the actuator
unplugged). In that case, you want to shorten the actuator arm
to raise the boost. A tight actuator (shorter arm) gives a
higher maximum boost (but encourages more boost creep, so don't
go too short).
If your turbo goes past the boost level
you'd like (too high) when you unplug the actuator (which
MAXES OUT your boost), you want to lengthen it's arm to
reach your correct high boost goal with the actuator unplugged.
Then the boost *will not* go past your desired boost maximum.
You need no
bleeds, no G-valves, and no
manual boost control of any kind to hold your favorite high
boost level. This works well only for guys and gals who desire
to run just a few psi less than maximum boost. If you try to
lengthen the arm enough to run 10 to 15 psi less than max, the
arm will be so long that the wastegate won't shut!
Simply unplugging the actuator at the track will give you
quick spool up to your favorite high
boost setting. Of course a simple cheap solenoid valve will
"unplug" the actuator for you when you turn it on with a switch.
The solenoid valve vents the actuator can to atmosphere, *just*
as if you unplugged it by hand.
Say you
like 22 psi... You simply adjust the actuator length to get your
desired 22 psi (or whatever) with the actuator unplugged, and it
will be a no-spike
22 psi!! No G valves to get dirty and be cleaned;
no bleed valves to adjust and re-adjust. No accidental forays to
30 psi! Less melt downs; less detonation, less headaches, and
almost maintenance-free.
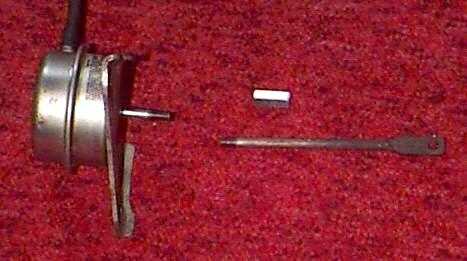
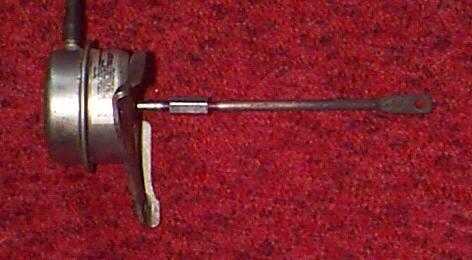
I threaded
the ends of the actuator rod after cutting it apart. Then I
picked up a "coupling nut" in 1/4-20 size. I then assembled the
arm, which is now similar to a stock T3 adjustable arm.
I changed
the length of the arm to get 25 psi with the actuator
unplugged. You can set yours for 19 psi, or 23 psi, or whatever.
Once the high boost is set, all you need to do to get your "low"
setting for launching and street driving is this:
That's
all there is to it; after you wire the solenoid, you have a
2 stage boost control that really works. VERY quick spool up; no
spiking; cannot overboost by accident! This set up will give you
a "low" o f whatever your new minimum boost is... if your minimum
boost becomes 5 psi after adjusting the arm length, then 5 psi
will be your "low" setting. After you get through the trouble to
set the best arm length for yourself, this is the simplest and
most effective 2 stage boost set up ever devised.
For those
who insist on setting their own "low" setting to 8 psi or 11
psi, or whatever, just do a little extra work, and you
will come up with a "normal rise" low, or a "quick rise" low
setting.
2
stage with quick-rise "low" setting
2 stage with "normal" rise low setting
After you've
chosen the ideal set up for yourself, wire up the solenoid as
follows:
OR,
my favorite:
The 2 wires
coming out of the solenoid will most likely NOT be black
and red! I just used those colors for my illustration. In
reality the colors of the wires is not critical; either wire can
go straight to 12V positive, and the remaining wire can go
through the switch/switches to ground.
Remember,
shortening the actuator arm raises
the boost you will get when unplugged, and lengthening
the arm lowers the boost you will get when
unplugged. If you know that you will need to be shortening your
arm, hacksaw 1/4" to 1/3" out of the arm and toss it away before
threading the ends. If you know that you will need to be
lengthening the arm, make one small cut with the saw to leave
almost the entire arm there.
You can fine tune the arm after installation by taking off
the 2 actuator bolts and rotating the entire actuator can &
bracket. Clockwise to raise the boost, and counter-clockwise to
lower the boost.
If it's easier for you to remove the clip and rotate the
arm, then go for it. But most will appreciate being able to
rotate the whole can, which leaves the pesky little clip out of
it.
When
you're done, you have a great 2 stage boost controller, and you
never have to worry about going too high with the boost by
accident; it will not go beyond your desired "high" setting! :
) | 